
As interior photographers, we always strive for photos that look natural, yet polished. Sometimes, though, it feels like a photo just needs a little extra “pop”. Is it the sharpness? Is it the contrast? Is it the shadows? It may be none of those!
Often, we first reach for the Contrast slider to give a photo a bit more definition. Before doing that, though, consider these other adjustments: Clarity, Texture, Blacks. Together, these three sliders will give you the definition your photo needs without the heavy-handed look of the Contrast adjustment.
Let’s take a look below and how these looks can differ:
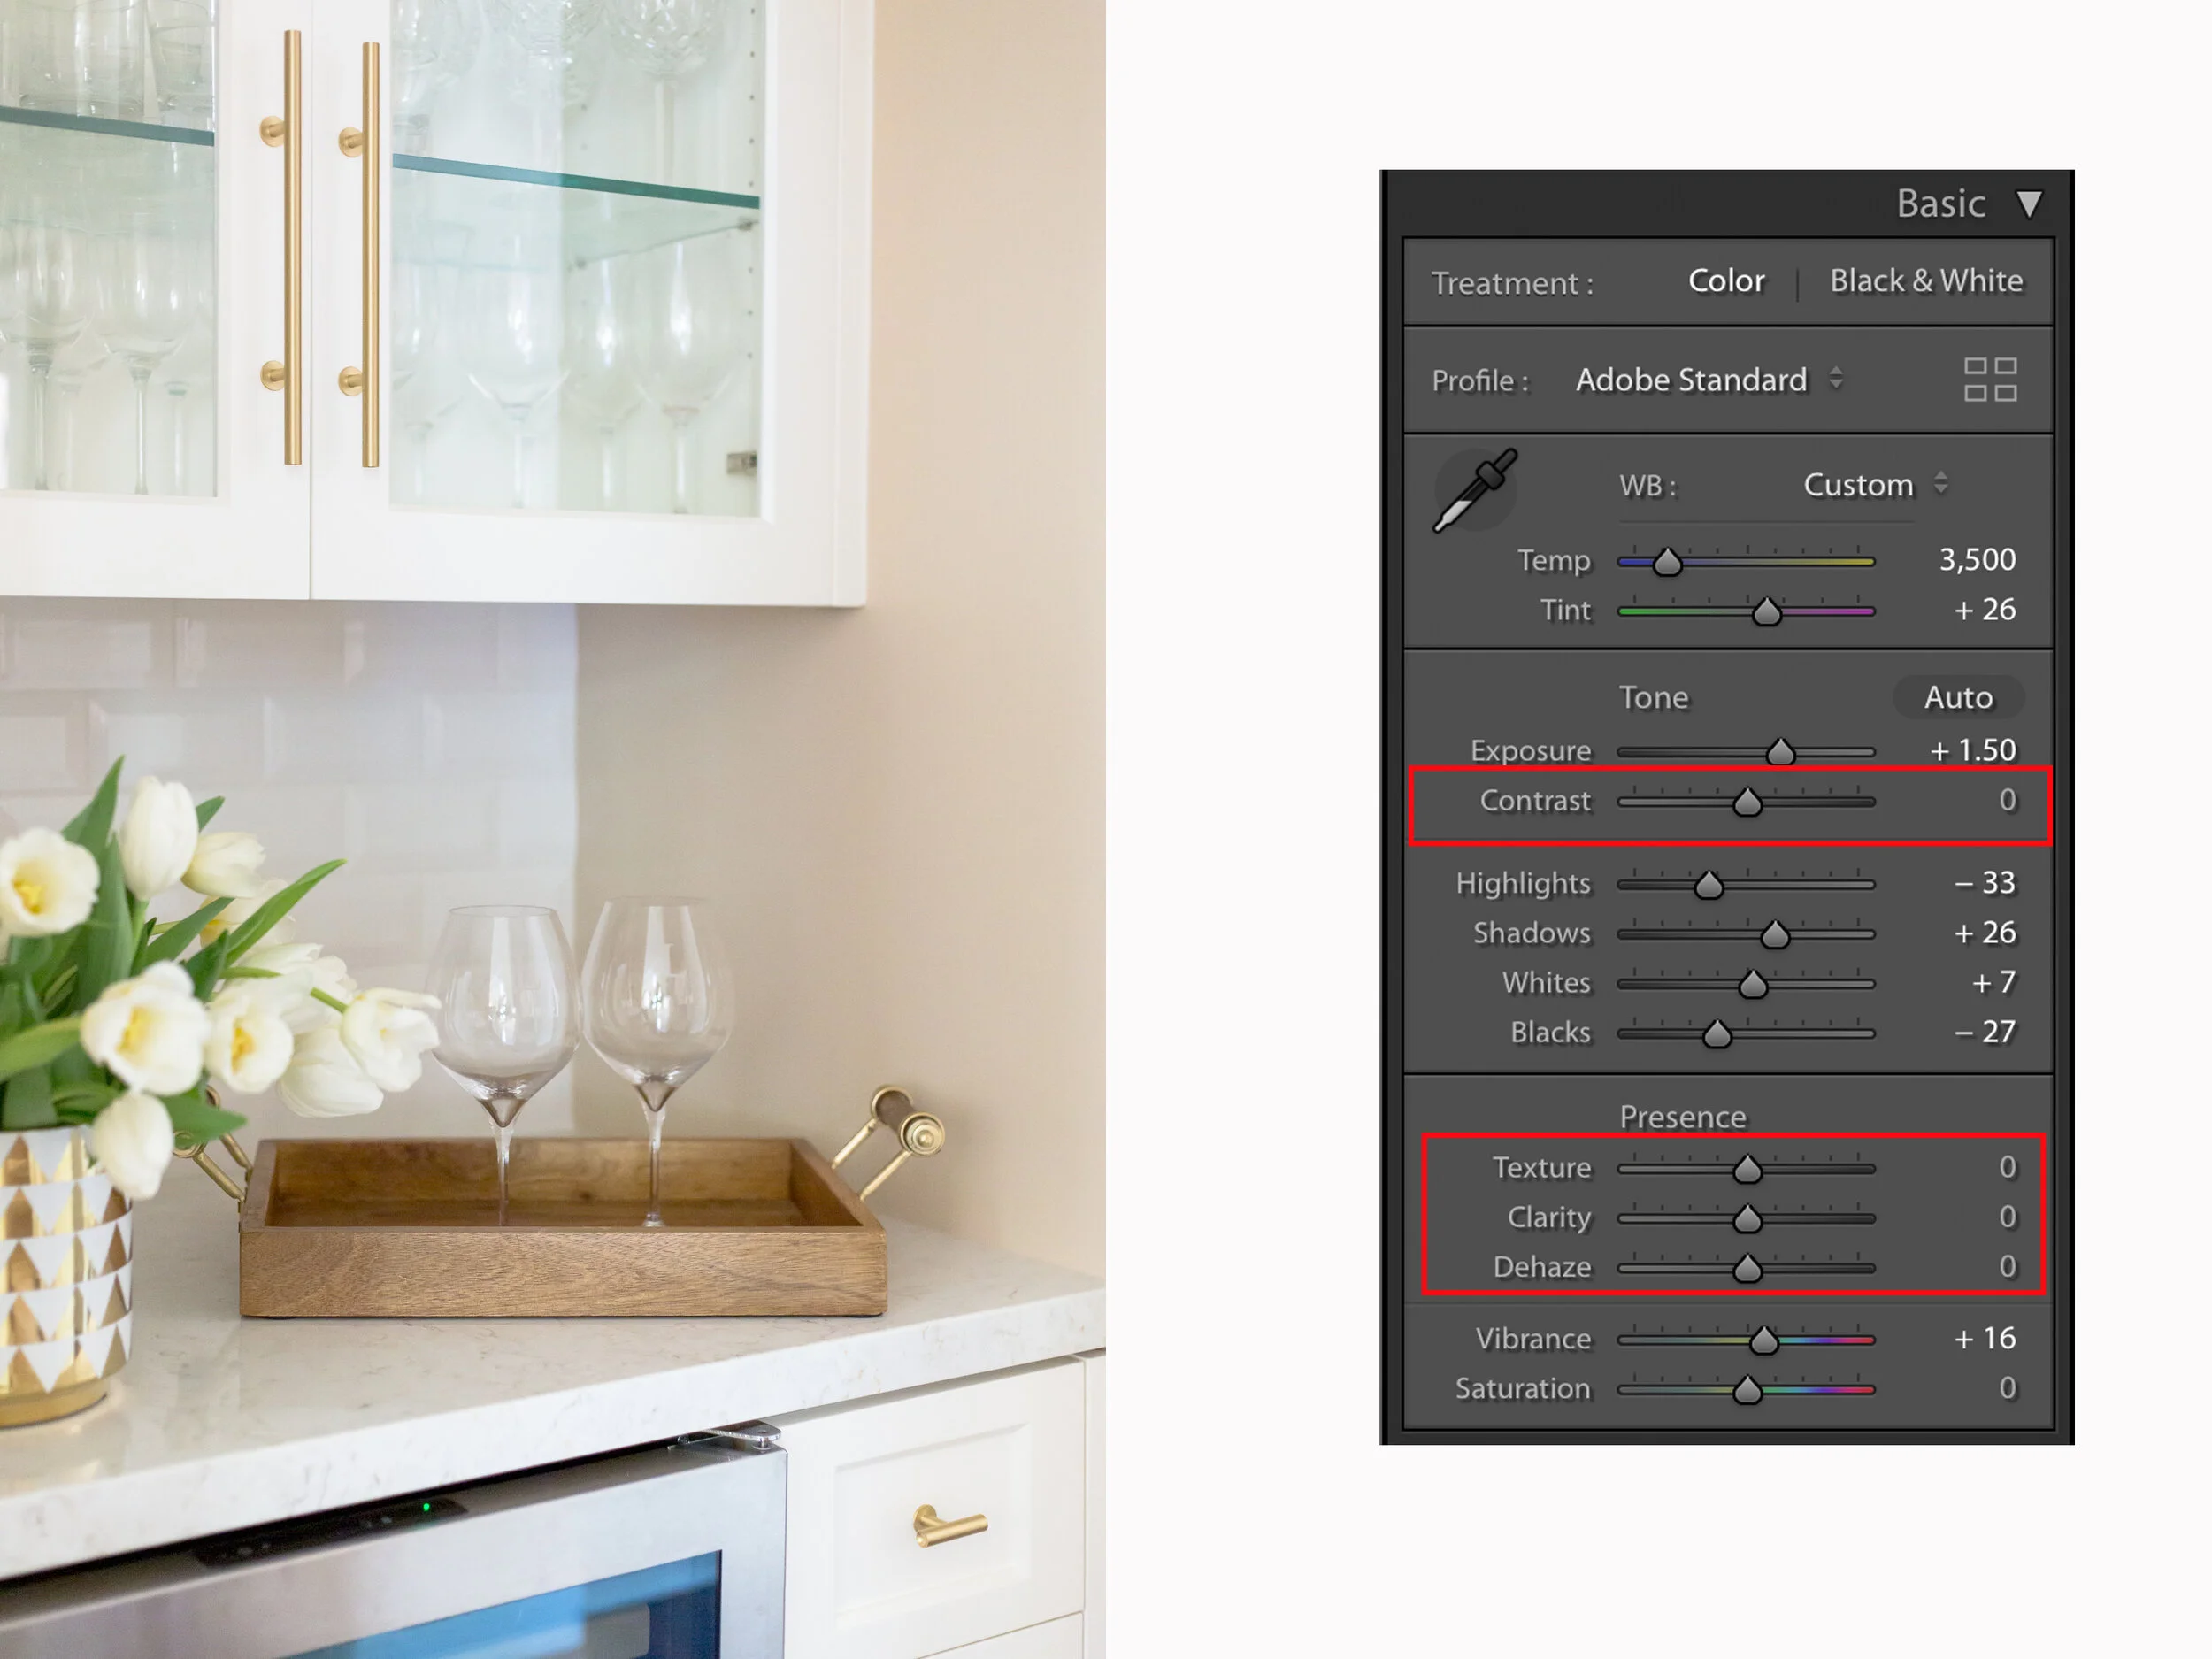
This first photo is the base photo. It’s been edited, but feels a bit too soft. It could use some more definition to really polish it up. Note the Contrast, Texture, and Clarity sliders are all at 0.
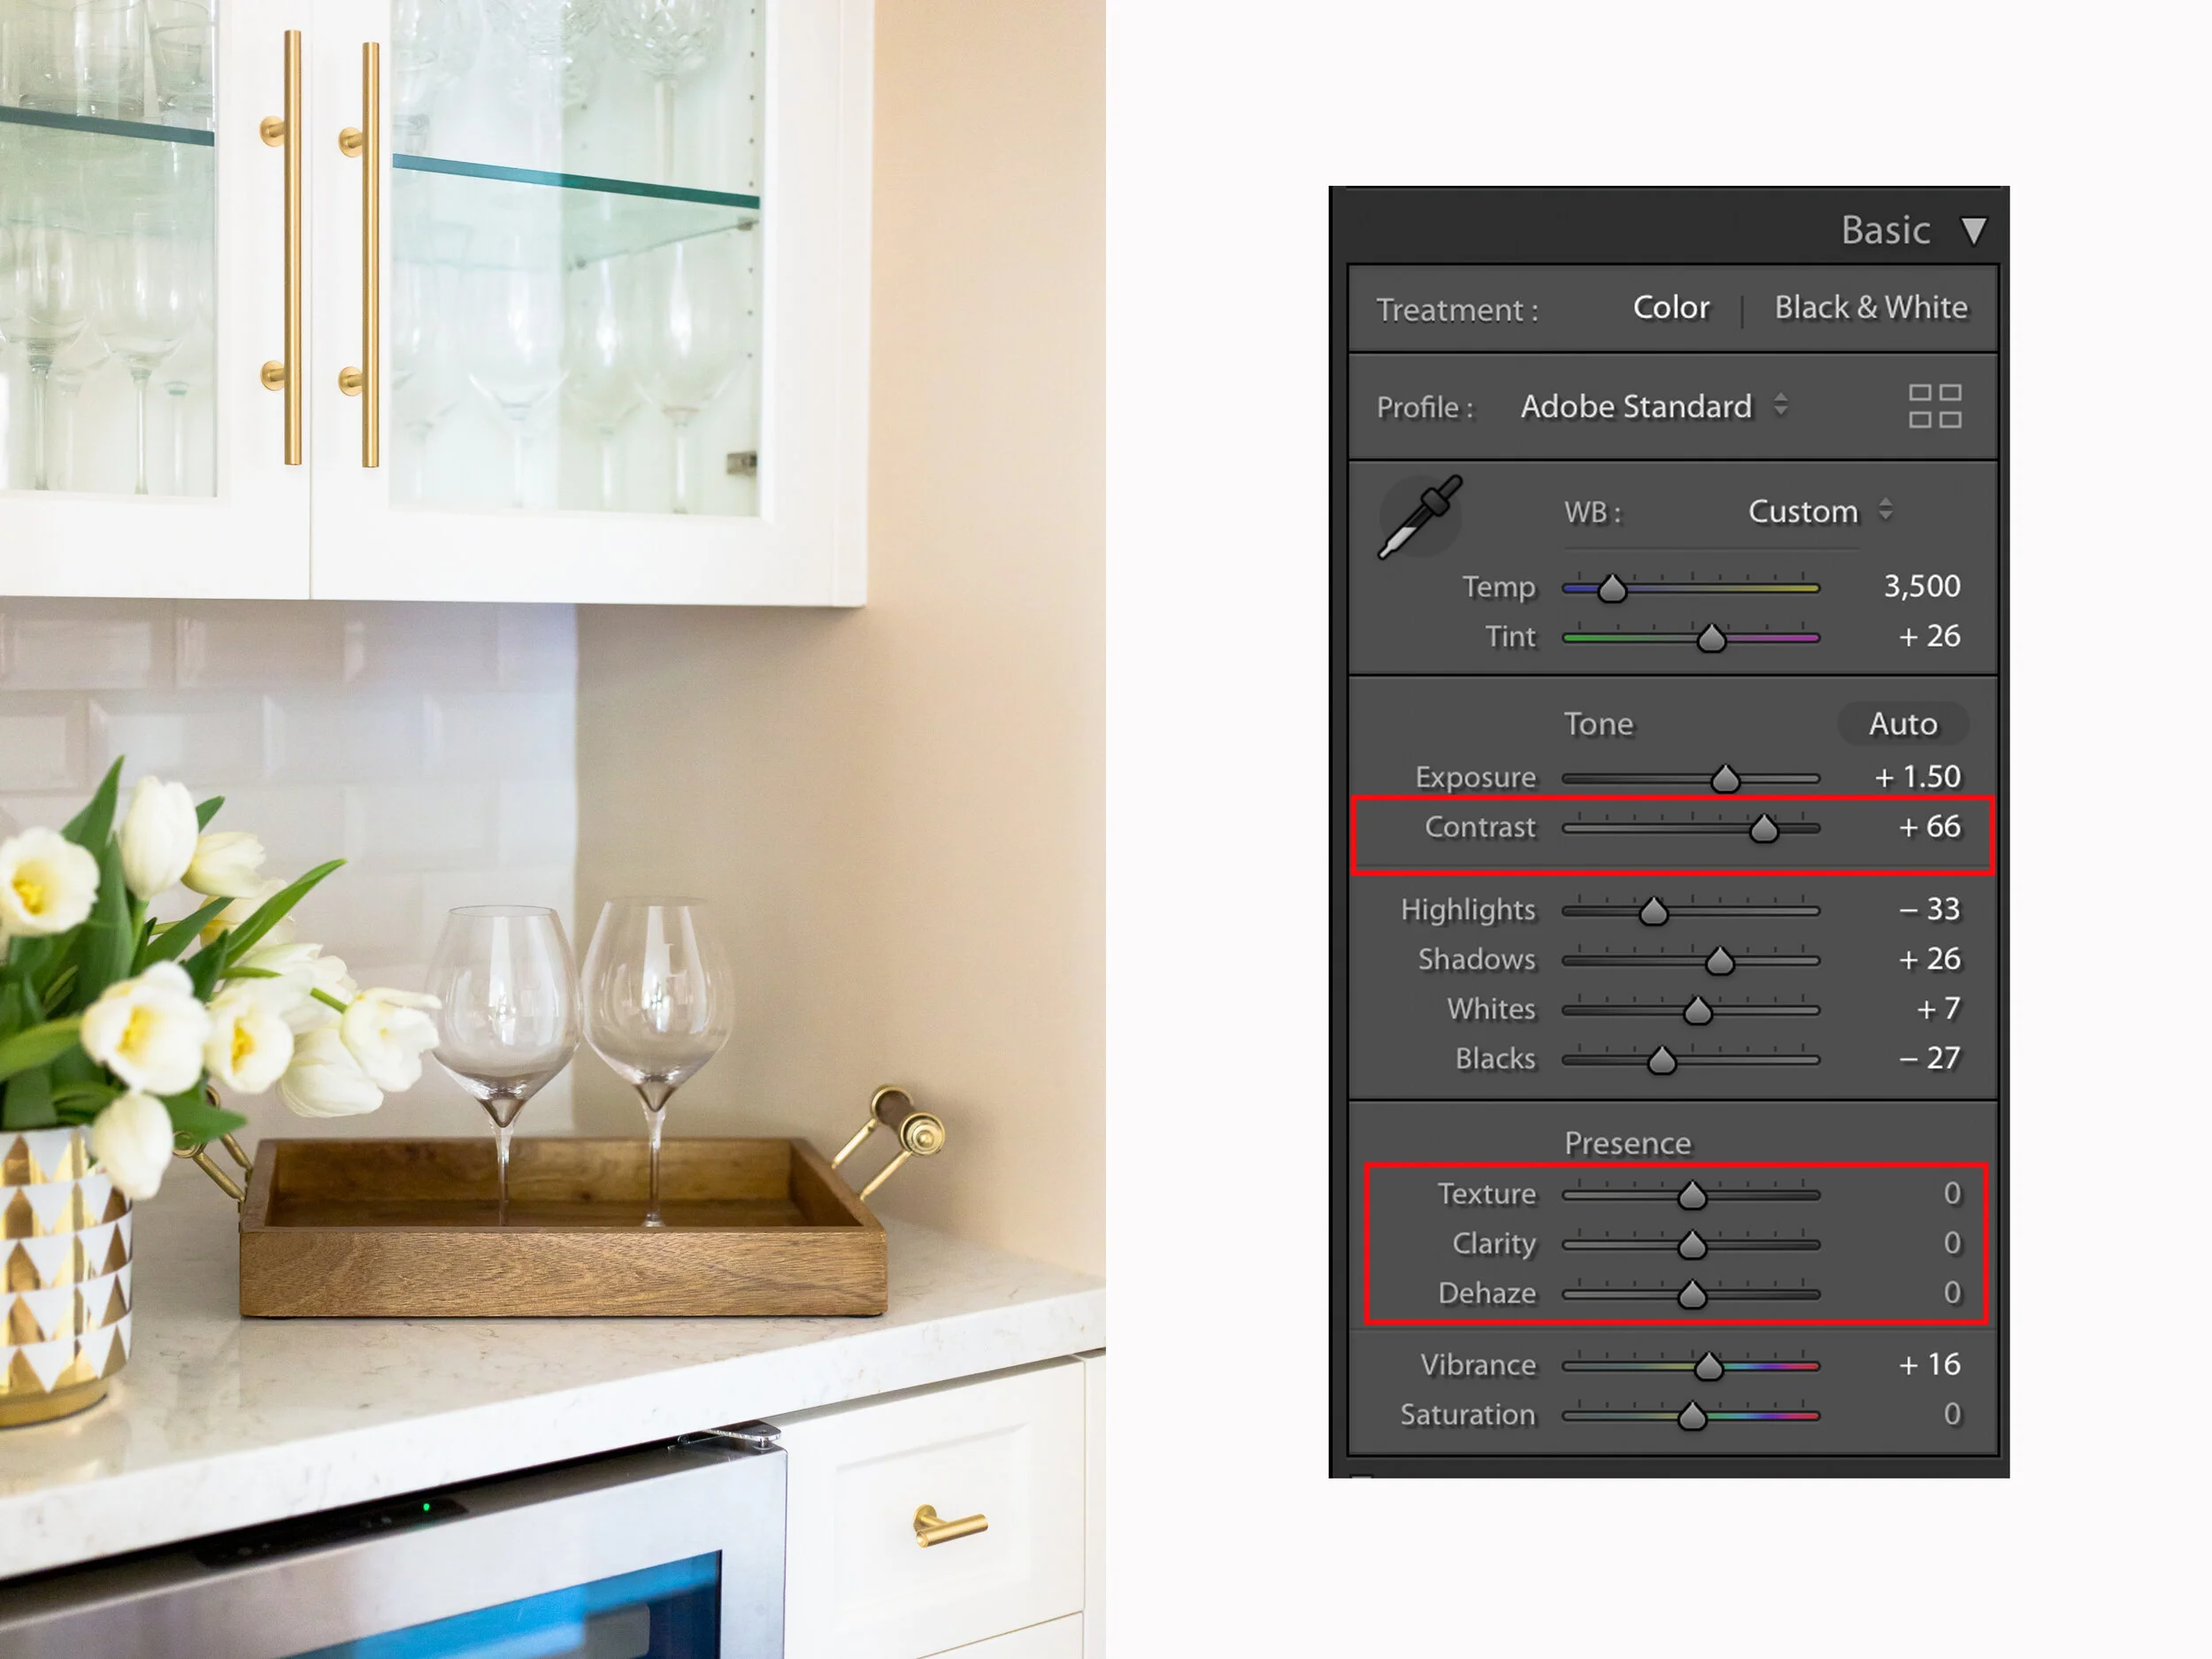
This second photo is with a contrast adjustment. The colors are become more saturated and you can feel the heavy-handed look of this adjust, especially when you look at the flowers and the wooden tray. Note the adjustments to the Contrast slider on this one.
This final photo is with adjustments to the Texture, Clarity and Blacks sliders - note their numbers on this one. There’s more definition, but the shadows don’t feel as heavy and the colors are not over-saturated. It’s more defined, but not heavy feeling!

Ultimately, these editing decisions depend on your personal style and what your client’s expectations are. Using the Texture, Clarity, and Blacks sliders to add definition, though, you get a higher end look with a polished level of definition.
Let’s take one more look at the three photos side by side:
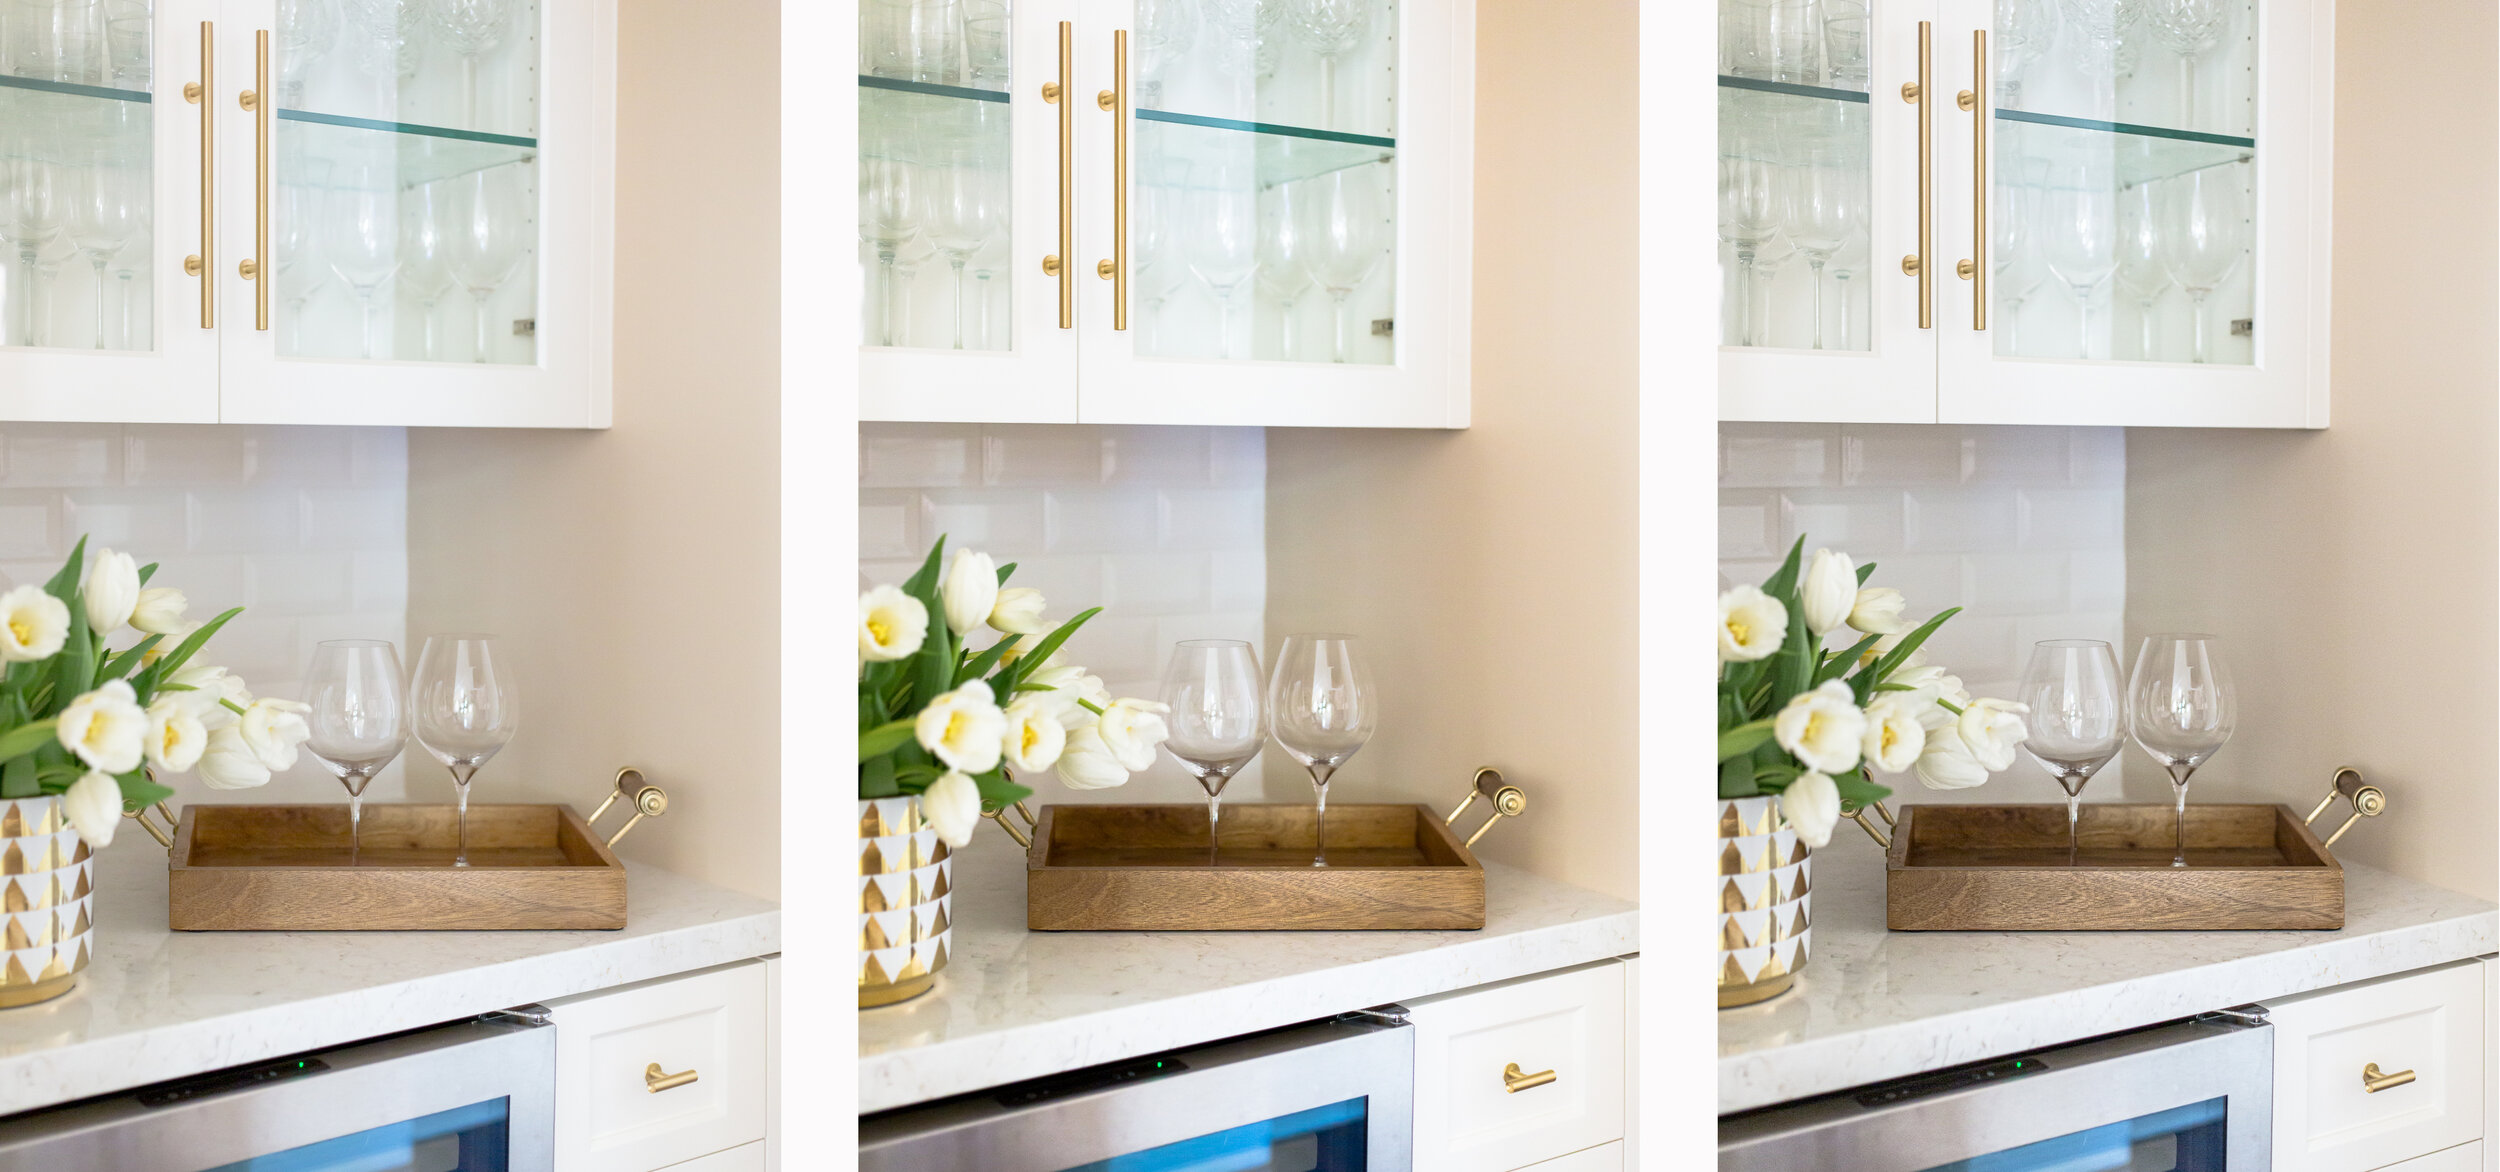
(From left to right) Base photo; Adjusting Contrast; Adjusting Clarity, Texture, Blacks.
So there you have it! Next time you’re looking to add more POP to your photo, steer clear of the Contrast slider and turn to the Clarity, Texture, and Blacks sliders instead. Your clients will love the results.
xo,
Natalia


